Friday, October 30, 2015

Print your label by home inkjet printer.

I usually print my own label using my Epson inkjet printer. I used to print them on light-weight white polyester-cotton blend fabric that I found here. The result was fine. If only it can hold more ink and was 100% cotton.

Last year I bought  5 yards of American made-PFD cotton fabric from eQuilter for wholecloth painting experiment. At first I thought that it was the same as Kona cotton but it wasn't , this fabric was thinner and stiffer than Kona. So I just left it in storage box. (Almost forgot about it.) Until yesterday I printed my new sized labels. I made them slightly bigger so I can use with bias maker. At first I printed them on white Kona , I ironed fabric to freezer paper and fed to printer. The result was terrible. The fabric was too soft. Then they curled and separated while printing. OK, Not every printer love Kona cotton. I had to clean printer head twice. If I have to print some thing on Kona I will order from Spoonflower. The next, I used American made-PFD with label sticker on the back. (Label sticker is the printable sticker that use for print product label). They were better than I expected. They looked great and the most important point was my printer still perfect fine.


After heat fixed and washing test, they slightly faded. Normally computer- printed fabric may fade after wash as the inks did not penetrate to the back. They just smear on top so they may scrub off while washing. As my craft may not wash often so this way were fine.


Actually I planed to print my labels on Spoonflower, those labels were my print testing swatch. With beyond expectation result, at this time I had 110 labels in hand for small purses and crafts. Anyway I may order quilt labels from Spoonflower when I finish my miniature quilt top. I was not decided that I should print the whole backing or small labels. 
Even though I found perfect combination for fabric printing with my printer (Epson ME 340, genuine Epson Ink), I will not print them often as the risk of printer's head broken is so high.

I just share my experience, If you would like to try this way, take your own risk. I am not responsible to your broken printer.

Have a wonderful weekend.


Saturday, March 7, 2015

Hexagon patchwork : English Paper Piecing

My goal for this year is making a miniature quilt. I found that English Paper Piecing is the recommended way for small geometric shape/tessellation quilts. I started with hexagon patchwork. At first I thought it was time consuming method as we had to work twice (I mean basting and piecing steps) and why the stitches are shown. I had tested and tried in different ways, tools and materials. The tips and technique that I share below was what I found and the way I work.

I: Materials and Tools

Paper Template - My favorite paper is 170 gsm cardstock. I had tried typical printing papers, cardboard and expensive plastic templates and don't like them all. I also printed and cut all paper templates myself.


Needle - I prefer short and small needle like #12 quilting needle.


Thread - I always leave the basting thread in my quilt so white threads/batting colored threads are my choice. I use both polyester and cotton leftover threads for basting. For piecing, I use coordinated color 50 wt cotton threads. At this time, 50 wt Aurifil is the best.
Fabric - Tight weave fabrics as quilting cotton, lightweight cotton are the best. I tried to use lightweight linen and the result is really bad. If I have to use them again, machine piecing and lightweight woven interfacing may help. Precut fabrics are awesome for hexies.


Plastic template - The most fun part of patchwork is Fussy cutting/Crop cutting. I make cutting templates from clear PVC sheet. I usually use square shape. If the prints are close or small hexies( 3/8inch or smaller), I will use the circle. Hexagon with 1/4 or 3/8 seam allowances is my last choice because it is the hardest way.


II : Basting

Just like the traditional way, I place the paper template to the wrong side of the fabric square. Fold the seam allowances over the template and baste.

I use paper clips, small binder clips and plastic binder clips for secure fabric and template while basting. I use a small back stitch to secure the two edge at each corner. If the edges are longer than 1 1/4", I will sew a few running stitches in seam allowances. The stitches will not go through paper template.


III : Piecing


 I use small, short whip stitches. I had tried ladder stitches and I got the weak and crooked seams. My favorite way is whip stitch while holding the folded edges together, not right side together like traditional way. With this way, the needle will catch only the back fabric and the stitches are almost invisible.
I found that plastic binder clips are useful when work with small size hexies. In this photo, they are 3/8 inch hexagons.


 For a hexagon flower/Grandmother flower, I assemble the petals (6 outer hexagon) and then join this c-shaped unit to the center hexagon.


For larger scale hexagon patchwork, I join them by row and then sew each rows together.


IV : Removing the template.
I just use my hands to remove the template. Use left hand to open the seam allowances, then grab the flat edge of template with right hand and pull it off. For 1/2" hexagons and smaller sizes, I use tweezers.

Happy sewing.

Saturday, June 29, 2013

Robot head iPad case

I'm back!!
I made this iPad case on April and forget to wrote about it. So sorry for not posting for a long time.


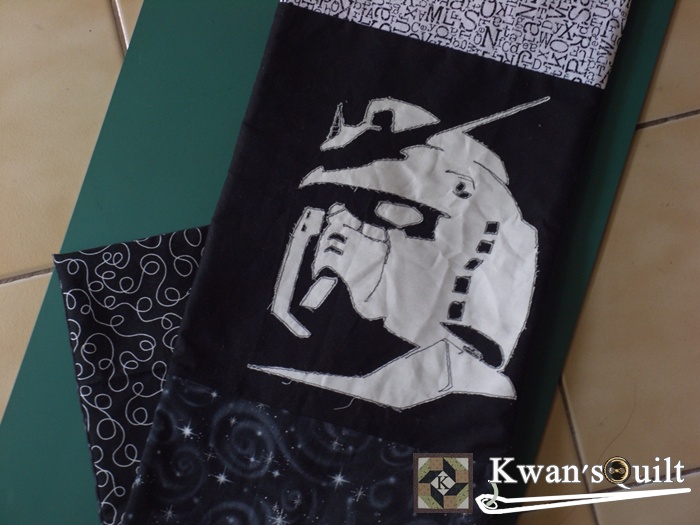
This is the 1st machine project after the coming back of my machine. My husband requested for his iPad case for months and I would like to try the new applique' method that I decided to do by machine. It mixed between back basting method, raw edge applique' and cutwork. I could not find the proper term for this method. Is it "reverse applique"? I didn't use fusible web for this project as I think it look soft and artsy with fray edge. As the design has a lot of small details and my hubby need the durable case. He was waiting for this case for a long..... time. I had to make it as fast as possible so machine applique' was the best choice.
(For back basting  I found the interesting blog posting here (You may find a lot of online articles about this method, just google "back basting". ) Almost of the articles for this method are hand work. I may try it someday, I think it is great for carry-all projects.)
The original picture had seen on my hubby's hobby magazine cover. It was too small and blur edge so I scanned the picture and computer drawed the new outline and add more details. This robot is Gandam RX78-2 from japanese manga.

This is how I made this case.

Resize and print the pattern on tracing paper, reverse the image.Bind the design on the wrong side of background fabric(Black). In this photo I hand-paint black color on the eyes and some spaces that need to cut out the white fabric after stitching.


And bind the applique' fabric(White) on the right side.


Adjust the machine straight stitch length to 15 stitches per inch. Stitch along the printed lines. From my experiences, the longer stitches may loose when we tear the paper off and the shorter stitches are bulky and may ruin the paper pattern before we finished. However the stitch length depend on the thickness of your paper if you use the regular paper (the standard printed paper or photocopy paper), you may use the shorter stitch than mine.


Rip the paper and adhesive tape off. I found the the 3M-Magic tape leave some glue residue on the black fabric so if you want to try this method, basting may be the better choice.


Trim the white fabric next to the applique' edges.


Join the top and back panel to the block. Then place the patchwork unit and backing right side facing together on top of the batting. Stitch around ,leave the opening on side and turn the right side out. Hand sew to close the opening.


To secure the applique pieces and quilting this pieces, FMQ along the outline of the applique' and quilt in the ditch next to the seam of top panel. Then hand assembled both side. Why do I choose to do it by hand? Oh, it is my hubby request, he want the soft, no-bulky seam case and bigger than normal case as it is easier to grab.
So it finished.

Happy weekend


Friday, March 22, 2013

Useful online articles for sewing

I found these useful links while searching "sewing".

Links
Encyclopedia of needlework
How to Sew By Hand - Basic Stitches

PDF Online
Hand stitches 
Sewing stitches
Stitches and Seam Techniques
Hand sewing
Basic sewing steps  machine sewing for puppet dress. Including with how to sew the zipper, button, snap button, eye and hook and velcro.
Free sewing book : sewing lessons for the beginners from go-women.com
Glossary of terms
Hand sewing needle guide from www.sewing.org 

Google book
Claire B. Shaeffer'book lists

I'll add more links in the future.

Happy weekend

Thursday, December 13, 2012

Tortoise Shell Purse : my first pattern

The first pattern is an adorable coin purse that inspired from ...turtle (what else?). I spent a month for it, designing and making the purse are easy steps but using the computer drawing program is not. I can made this purse and take the step-by-step photographs in a day and then spent the other days for drawing, printing and checking ....repeat the process again and again to make sure that had no any mistake.


This purse is the excellent project to the hand-sewing lover, there is only one step that can do by machine. As I had tried to join them by both ways, I found hand piecing is faster and easier. It is also the proper way to use the beautiful scrap fabrics and the leftover batting.

Now available on my Craftsy pattern shop and Etsy shop.


Thursday, October 4, 2012

Handmade turtle doll

I made it on tuesday and finished on yesterday morning for my newborn niece. Because of my sewing machine incidence, I have to do it all by hand. Well, I think it is easier with hand sewing as there are a lot of curves and sharp corners ,it is my first time to make all-handmade-cloth doll, so addictive. I will do it again if I find proper fabrics. The doll is made from super soft Korean fleece that cannot be find in my area right now. I bought it from .....somewhere ( blame my short memory) and leave it in my fabric storage box for a long time. I think that I had a plan to make some of children goods in that time.
I try to update this posting on my iPad with blogger app, very difficult, because of a tiny keyboard, why google team do not release the iPad app, typing on iPad with iPhone keyboard is ridiculous.

Happy sewing!

Kwan

Tuesday, October 2, 2012

Stop for machine sewing for a while.........

Today my sewing machine is broken again when I have so many projects in have-to-do-it list. First is my square bag that still in progress (Oh, waiting for the proper zipper, I found it out of stock in my supply shop, why everyone bought the brown zippers?). The second, my husband's Ipad case that my machine is stop during the applique' process. I try new applique' method (for me), reverse applique' that I will show you next time when  my machine come back. The third, pumpkin handbag , I got an idea and draw it in my Ipad yesterday, have a plan to cut the fabric but everything have to stop because of the same reason and I still have no free time to bring it to repairing center.
What should I do?
Maybe I should go back to little hand sewing project, EPP hexagon?

Hope you have a nice day!!

Wednesday, August 29, 2012

3 Pockets Big Square Bag

Last year I designed and made it for my bestfriend as a diaper bag. I have a plan to make it again because I would like to try to sew zipper by machine. It is easy with straight edges but for curve edges a little bit difficult.


Today is cutting time!!...and basting the table runner.

Have a nice day!!

Monday, August 20, 2012

Come Shine Nine Patch Table Runner...Finished Top

My mistake!! It should be gradation block but...Look. The center squares are too white and outer red are too dark. Looked like I had a nine patch and cross quilt instead...Yeah.. It seemed to be fine with 3 layers border but that not my plan. Goodbye to gradation concept, I will try it next time if I can find more proper fabrics. Mental note, next time have to mount the whole quilt to check overall picture before stitching.


At least, I had tried.

Happy sewing!!


Friday, August 17, 2012

Come Shine Nine Patch Table Runner....Piecing

This quilt inspired by sunrise. As I have to make a wall hanging homework project for nine patch lesson and would like to try a new idea that pop in my head,  what about playing with gradation color block. The color value should be lightest at center and higher to outer....we will see.
So these are piecing step pictures for my own design table runner. As it is homework project for hand quilting class so every stitches be sewn by hand...no machine touch.. This is the first time I think back view is prettier than the front...Like a sea of seam. Hand piecing is fun.


But...I still miss my machine....
Next time I will show you the front of top.
Happy weekend!!

Basic Hand Quilting Class at Pretty Quilt Part 4

Lesson 6 : Lemon star
Project : Lemon star pillow case
The couple pillow cases I made as a wedding gift for my hubby seniors. I used the leftover fabrics from triangle patchwork bag for center star. I had learned about how to draw a pattern , sewing the set-in seams and how to make a pillow case.


Happy sewing!!

Monday, August 6, 2012

Indian Purse

As I posted about my smocking experiment last month, this purse is the result.

Indian Purse Front View

Indian Purse Back View
Inside my Indian Purse

For this bag I used smocking method that I learn from my quilting teacher, Nicole Park (Pretty Quilt's owner), and she gave the stripe fabric to for make folding center piece. I designed and draw bag pattern myself, I gave the pattern to Nicky (as a returning gift because she don't charge teaching fee for this method) so she can used it to teach other students.
I am not giving up for smocking yet. I still have one more project to go, the four petal flower smocking. First I planed to make a large tote bag but I found that it look like a big pillow so I will change design. I have no idea. Maybe I should drop it for awhile.

กระเป๋าใบนี้ครูอิ๋มสอนวิธีทำสม็อกกิ้งให้ค่ะ และให้ผ้าลายทางมาด้วยแลกกับการไปช่วยงานตอนที่คุณครูนิกกี้จัดเวิร์คชอบสม็อกกิ้ง กระเป๋าใบนี้ทำเสร็จวันที่จัดเวิร์คชอบค่ะ ซื้อผ้าทำตัวกระเป๋า ปากปิ๊กแป๊กที่ร้านแล้วทำเลย ขวัญวาดแบบกระเป๋าเอง คิดว่าทรงและขนาดกำลังดีค่ะ ใครอยากเรียนติดต่อที่ร้านครูนิกกี้นะคะ ยกแบบกระเป๋าใบนี้ให้ครูไปแล้วค่ะ
ส่วนโปรเจคสม็อกกิ้งกำลังอยู่ในสภาวะหยุดนิ่งชั่วคราวค่ะ คือทำออกมาแล้วมันเหมือนหมอนอิงมากๆ ต้องเปลี่ยนแบบค่ะยังนึกไม่ออก คงต้องทิ้งไว้สักพักค่ะ

Have a nice day!


Saturday, July 28, 2012

Preference Test...Hand or Machine piece.

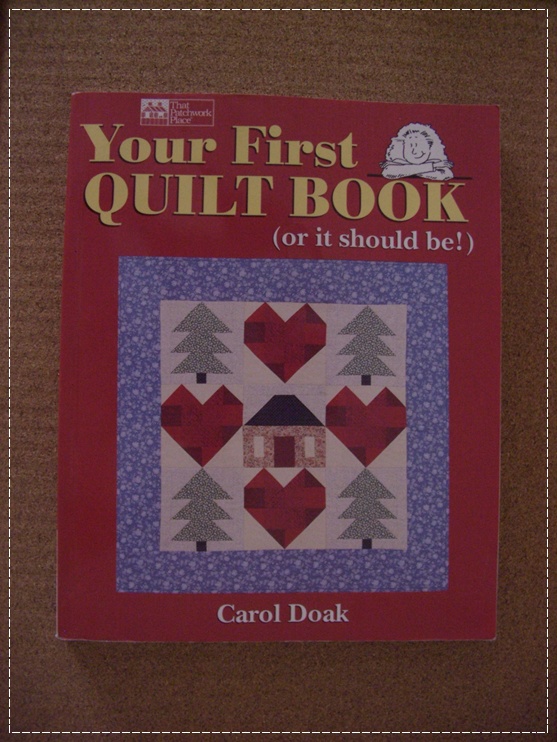
I found this preference test from Carol Doak's book " Your First Quilt Book ( or it should be!)". Very helpful to beginner quilters to make a decision for their first quilt project, hand piece or machine piece?


I bought this book from second hand book shop last month, good basic quilt book , a lot of picture and basic techniques and fun. The author has sense of humor and great teaching skills. It is not my first quilt book but I found it is very useful.
On page 55, she said "the following questions for beginning quilters will give you some insight into your preferences". I think it really fun so I would like to share. Should we try? Here we go.

Preference test
Answer "yes" or "no" to the folllowing questions
1   Do you own a sewing basket?
2   Is your sewing machine stored in someone else's garage or another remote location?
3   Do you like to sit and visit with friends and family, but still keep busy doing something else?
4   Are you on the run with children to dentist appointments, etc., and a fan during their sporting events?
5   Do you feel relaxed when you hold a sewing needle in your hand?
6   Do you enjoy the sense of creating a little bit at a time?
7   Do you like to take new experiences at a slow pace?
8   Do you enjoy working with your hands?
9   Does you breathing rate increase when you sit at a sewing machine?
10 Do you consider sewing at the machine "work"?
If  you answered "yes" to most of these questions, hand piece your first patchwork project. If you answered "no" to most of these questions, answer the following questions.

( My answer: 
1.  Yes, I made it myself.
2.  Absolutely no!! Always keep it in my home.
3.  No, they will kill me if I do that.
4.  No, I don't like to do my work outside, I always lost some of my pieceworks..such a clumsy person.
5.  Yes, sure I really love sewing.
6.  Yes, love every minutes of crafting time.
7.  NO, I don't mind to make a complicated work but I don't like to spend a lot of time for a slow progress project. It's a little bit boring for me to repeat the same process over and over again , that a reason that I cannot finish my mini hexies quilt. I sincerely respect everyone who have patient to make large projects of english paper piecing.
8.  Yes, absolutely yes.
9.  No. It's my relaxing time.
10. No, I love to play with my machine. )

1   Do you own a sewing machine?
2   Do you know where it is?
3   Have you ever sewn on a sewing machine?
4   Do you clean the lint from the bobbin area regularly?
5   Do you change the needle regularly?
6   Do you breathe at relaxed intervals when machine sewing?
7   It's 11 p.m.-do you know where your owner's manual is?
8   Do you know what the buttons and knobs on your machine do?
9   Do you "escape" to sew at the machine?
10 Can you get your machine up and running in less than 15 minutes?
If you answered "yes" to most of these questions, machine piece your first patchwork project.

( My answer:
1. Yes.
2. Yes, sure.
3. Yes, always sew by machine.
4. Yes, every time after finish my work.
5. Yes, Needle have to be change for every project.
6. Yes, sure. Recently I found that Beethoven's "Ode To Joy" (Final movement of Beethoven's 9th symphony) is the best song for freemotion quilting. Just let my hand flow along the rhytym of music, make stitches even than before.
7. Yes, always keep it in my sewing machine bag. I can remember almost of it.
8. Yes, I had tested every functions of my 10 years old machine.
9. Yes, I had spent a day with my machine, why not, it is my favorite time.
10. Yes, I ruined my machine twice by overload working, I sewed nonstop for a day and end with motor damaged machine. After second repairing I have to set alarm clock for breaking time. )

How about your?

Hope you enjoy.


Thursday, July 26, 2012

Basic Hand Quilting Class at Pretty Quilt Part 3

Lesson 5 : Fabric Doll and Basket
Project : Rabbits and Basket
Really love this project, as I am a rabbit lover so I made 2 dolls, Mr. and Ms. Bunnies.


ตะกร้าน้องกระต่ายคู่ ถ้าไปเรียนที่ร้านครูไม่ต้องทำสองตัวนะคะ คิดว่ามันอยู่ตัวเดียวคงเหงาเลยทำเพื่อนให้ค่ะ
Happy sewing!!

Thursday, July 5, 2012

Smocking experiments

Well, back to the days, I was studying in secondary school. I learn to make a pillow with smocking from satin. Never thought that I could do other projects with this sewing technique. Last week I read japanese sewing magazine. (Oh!!.. I have to tell I can't understand japanese articles but there are a lot of pictures or I should say that I just scan it instead.)  So I have an idea to make the smocking purse. These are my new experiments, I would like to learn and try several styles of smockings before design and make a template...What should it be?

อ่านเจอในหนังสือญี่ปุ่นที่คิโนะคุนิยะ สม๊อกกิ้งนี่ทำเป็นกระเป๋าก็สวยดี เลยลองหัดดูเล่นๆ เป็นงานทดลองค่ะยังบอกไม่ได้ว่าจะสำเร็จหรือเปล่า ยังมีลายอื่นๆอีกที่ยังไม่ได้ลองทำค่ะ

Happy sewing.

Sunday, June 17, 2012

New Quilt Blog Linky Party

 Big Thanks for Marcia!!!
You're the best!!

I join in the amazing linkin party created by Marcia From Crafty sewing & quilting blog , called New Quilt Blog Linky Party for less-than-50 followers blog.....that my blog!!! After kept posting and quilting for long time, I think this is time, I should find quilting and sewing lover friends and show my supports. So I joined and started to follow all the blogs. :)

Let's follow each other!..I will follow you if you follow me. ^^

If you want to get an opportunity and find a new friends. Click the link below.
Crafty Sewing & Quilting: Are you a NEW Quilt Blogger?


Have a happy sewing day.

Kwan

Friday, June 15, 2012

Basic Macine Quilting class part 6 (FINAL)

Lesson 6 : Crazy Patchwork
Project : Crazy Table Square
Finish size : 100 x 100 cm

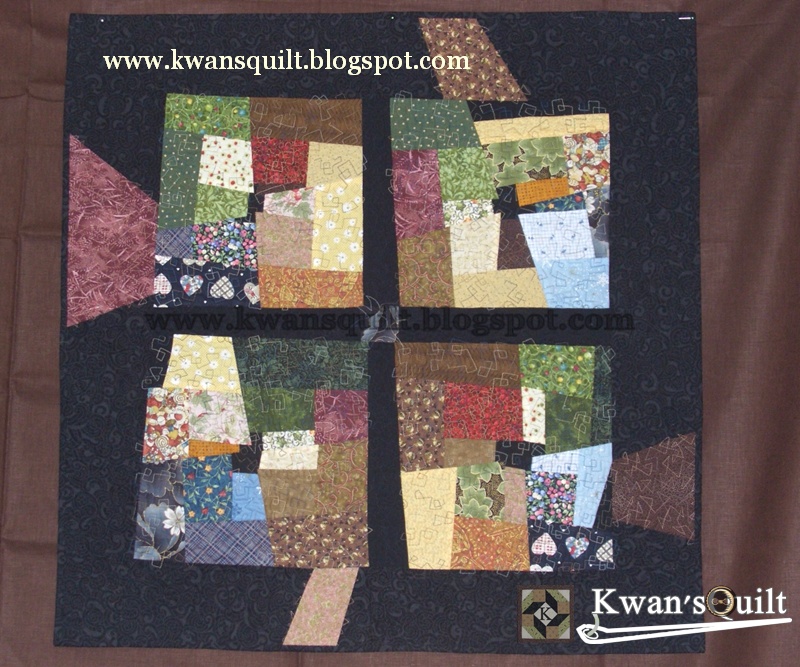
Last homework for the class, does it look familiar? ....See!!.. It's the picture of my avatar for almost of my pages, my blog, my facebook page and etsy shop. Making this quilt, I found my passion. I like piecing than applique, prefer machine than hand sewing, adore paper-piecing and love freemotion quilting.


For this quilt I decide to try new patterns of free motion quilting,  5 difference styles, free hand flower for center, meandering for sashings, continuous squares for 4 crazy blocks, continuous swirls for black borders and crystal for color borders.

Close up for center and blocks quilting


Close Up for border and block quilting

Close Up for border quilting
การบ้านชิ้นสุดท้ายสำหรับเบสิคจักรค่ะ รูปของงานชิ้นนี้ถูกใช้เป็นอวาทาร์สำหรับโปรไฟล์ในทุกที่ทั้งในเอทซี่ บล็อก และ แฟนเพจของเฟสบุ๊ค ยกเว้นในหน้าเฟสบุ๊คตัวเองจะใช้รูป ให้ได้เห็นหน้าค่าตากันบ้าง หลังจากจบงานชิ้นนี้แล้วก็ได้รู้จักตัวเองมากขึ้นว่า ชอบงานจักรมากๆ โดยเฉพาะฟรีโมชั่นนี่โปรดปรานมาก ชอบต่อผ้ามากกว่าแอพพลิเคล่ และชอบทำเปเปอร์พีชซิ่งมากๆ
ว่าด้วยควิ้ลท์ผืนนี้ต่อ ชิ้นนี้ใช้ลายฟรีโมชั่นทั้งหมด 5 ลาย อยู่ตรงไหนบ้างให้ดูตามรูปได้เลย งานนี้ได้ลองทำลายใหม่ๆที่ไม่เคยลองมาก่อน โดยเฉพาะลายที่ขอบที่ผ้าสีดำเป็นลายที่ครูแองจี้ใช้ควิ้ลท์กระเป๋าใส่โน้ตบุ๊คให้ลูกสาว สวยมากและดูงงมากๆ ท่าทางจะยากก็เลยบอกคุณครูว่า ขอลองทำดูนะแล้วก็มาลองทำเองที่บ้าน ปรากฏว่าง่ายกว่าที่คิดและสนุกดี ส่วนที่ยากสำหรับตัวเองก็คือตรงส่วนที่เป็นลายสี่เหลี่ยมต่อเนื่องกันเพราะเคยชินกับการทำลายโค้งๆ ทำให้เป็นมุมแหลมๆมันคุมจักรยาก เพราะอยากจะให้มันดูพริ้วและเป็นเหลี่ยมด้วย สองอย่างนี้อยู่ร่วมกันได้ยาก คิดว่ายังต้องปรับปรุงต่อค่ะ ต้องฝึกเยอะๆค่ะ

Happy Sewing..^^